Home > Training Admin Role > Curriculum > Course Catalog > Course File > Course Skills Page
Course Skills Page
Page Location: Admin > Curriculum > Course Catalog > Course File > Course Skills Page
The Course Skills Page is where to attach skills or competencies and the level obtained for that course. As a student completes courses, the skills listed with each will create a record in the student's skills page indicating the students have gained that skill or competency and the level obtained. Review this section to learn a little more.
What is displayed in this section?
How do I add/edit a skill?
How do I add drop-down values to a question?
How do I add a picture to a question?
Back to the Top
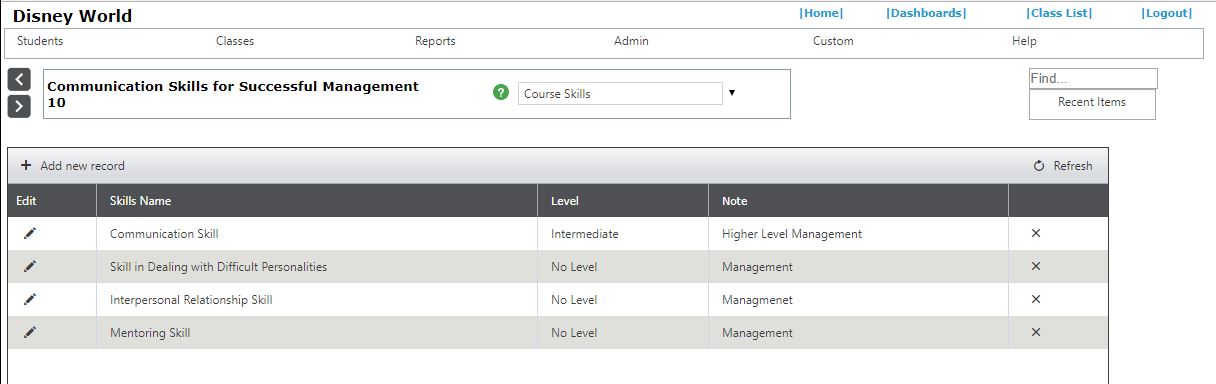
The Course Skills Page is a drop-down option in the banner at the top of the page. When it is selected, this is what one will see. There is table or grid that contains all the skills possible with this course.
Field Name
|
What the Field is for |
Additional Information |
| Pencil Icon (Edit Option) |
With the right user security setting, one will be able to modify a skill listed on this page.
|
N/A
|
| Skill Name |
This required field indicates the skill that is connected to this course.
|
The Skill options are a user-defined code table - available in Admin > Codes > Skills. |
| Level |
This required field indicates the level of the skill.
- No Level - there is no level for the skill only that one gets it
- Entry Level - 1st & Lowest Level
- Intermediate Level - 2nd Level
- Advanced Level - 3rd Level
- Expert Level - 4th & Highest Level
|
Levels are hard-coded and not user-defined.
|
| Note |
This required field allows for additional information about the skill.
|
The field is required to make sure informaiton is captured when add/editing a skill to provide additional information. |
| Delete |
This icon, when clicked, removes the skill from the course.
|
NOTE: Clicking the X icon will remove the skill from here as well as student record.
It is recommended to 'inactive' the skill in the skill code if the skill should no longer be used. Else, delete it from here as needed.
|
Back to the Top
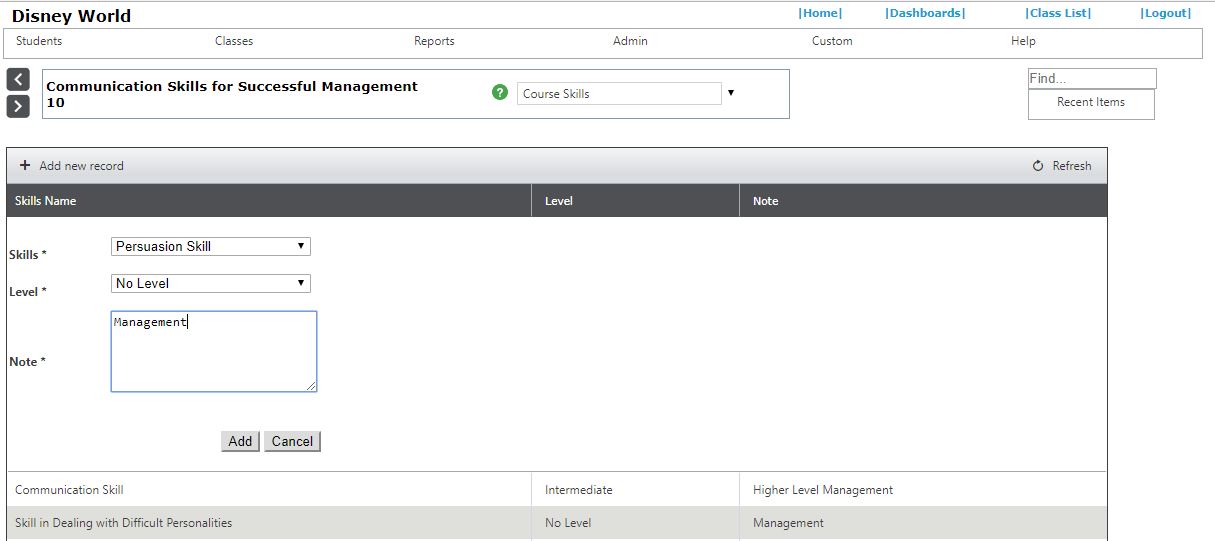
To add a new skill to the page, click the Add new record. Else to modify an existing skill, click the Pencil Icon (Edit).
Field Name
|
What the Field is for |
Additional Information |
| Group |
If you want to use a question from the bank of questions in Admin > Page Builder > Course Test Question and want to filter the list down, select a category from this drop-down list.
|
You do not need to use this field unless you want to add a pre-existing question. |
| Select Question |
This drop-down list contains all the pre-existing questions in Page Builder > Course Test Question section. If you use the field above, the list here will be restricted to that group, otherwise all questions from the bank of questions will display here in alphabetical order. |
You do not need to use this field unless you want to add a pre-existing question. |
| Question |
This long-text box will either contain a question you selected from above in an edit mode or will be blank for you to create one from scratch.
|
The question entered here is how it will look to students on the test. |
| Answer Type |
The Drop-down list with the following options:
- Drop-Down: This creates a hyperlink on the Course Test table allowing for users to enter the drop-down answer for the question. Students will select one of the answers to complete the question.
- Short Text: This option is about 50 Characters in length. It should be used when the student needs to answer the question with 1 or 2 words.
- Long Text: This option is a long scrolling open text box and should be used when the student needs to answer with more than a couple of words.
- No Answer: This option does not create an area for the student to answer anything but rather puts a statement on the test to provide the student with additional overall information or specific information on about the how to answer the next set of questions.
|
When you select...
(1) Drop-down: Make sure you go and put the drop-down values in at the table level that holds all the questions. When putting the question in here and setting it to drop-down, you are not actually creating the answers for the students to select. If you miss the step to add the answers, then the students will not be able to complete this test question.
(2) No Answer: You might want to make this one required to be on the test. If your test is randomized, meaning you have less number of questions on the test view to the student than what is listed here, you don't want this one to be left off if it is information that the student needs to read. |
| Order |
Select the order in which this test question will show up on the test.
|
Even if the test is randomized in selecting questions to put on the test, they will always show in the order they are listed here. This is especially important if you are using a 'No Answer' type to provide information about a section of the test. You would want those instructions to show above the right questions. |
| Required on Test |
If this YES/NO field is set to YES, then this question will always appear on the test.
|
This is more for tests where you utilize the randomization of questions. If most of the test can be randomized but there are some key questions that need to be on every test, this is how you do it. |
| Required to Answer |
If this YES/NO field is set to YES, then when the question appears on the test, you cannot submit the test until all required questions are answered.
|
N/A |
Back to the Top
After you add a question to the Course File, if you selected the answer type Drop-Down, you have one more action item to do in order to complete the question. From the Course Test Page that displays all of the test questions for the course, locate the column that reads Type and click on the Drop Down hyperlink for your question. It should take you to a page like below.
From here click the Book with a Plus Sign Icon (Add) to add a new drop-down answer. Note that once you add the value to this page, you cannot edit the answer. So if you have typo or want to phase the answer differently, you will need to add a new one. You can, however, change the order of the options as well as the point value of the answer. If you want to change the order, use the up/down arrows to do so and delete answers options you don't want.
NOTE: Modifications here to existing questions should not be made if the course has been used and students have taken at least one test because it will change the properties of the student's test. If changes are needed, it is best to copy the course to create a new one. The questions will copy over to the new course, where you can make the necessary modification. Then push out the new course/requirement and inactivate the old one.
Back to the Top
Currently, you can add an image/picture to a test question but not to the drop-down answer types. To do this, you need to know a little HTML and the image has to have been uploaded in the Image Folder on the server. If you have the image(s) you want, give them to your IT team and ask them to upload them to the Cyber Train Image Folder on the server. If they need assistance in looking for that folder in Cyber Train, please contact Product Support.
Go to the Course File > Course Test Page and click either Add new record or Pencil Icon (Edit) as needed. In the Question field, put the following HTML tag where you want the image to display:
<img src="images/mickeymouse.gif" border="0"/> The 'mickeymouse.gif' is the part of the HTML that would contain the name of your image.
Example Question:
Who is this a picture of: <img src="images/mickeymouse.gif" border="0"/>
See also
|