Home > System Admin Role > Processes > Import Courses
Import Courses
Admin > Processes > Import Courses
Watch How To: Import Courses NOW!
The Import Courses is mostly used during the implementation phase of the project, but in some situations, clients may need to import (or update) courses.
Courses are used as:
(1) Training requirements for students to be tracked, completed and reported.
(2) Templates to create classes used to complete said requirement.
(3) Attain Skills/Competencies and are used to create Programs.
(4) To create programs and/or credentials necessary to track with students as well.
Spreadsheet Considerations:
(1) Use an Excel spreadsheet (.xls NOT.xlsx)
(2) The spreadsheet file can be saved to the computer under any name needed BUT the tab that holds the information needs to be:
(a) First tab ONLY!
(b) Labeled the default name - Sheet1
(3) Recommendation - Test the import with only a few records so one can spot check the results
Course Coding Scheme Recommendations
How do I set up the Spreadsheet?
How do I set up the Import Courses process?
Frequently Asked Questions
Back to the Top
It is advisable to adopt a course coding scheme as it will serve your organization in the long run.
Consider your current course codes you have and see if it fits overall for tracking and reporting. If it does not or it is not consistent, consider our suggested coding scheme. We recommend at least a 3-part code (Category-Course Name-Version)
Part 1: Category
(1) Do you have multiple companies in the system? Perhaps the first part of the code is the company.
Example - Company - Visibility Software (VS)
OR
(2) If you don't have multiple companies or multiple companies will be utilizing the courses, perhaps another category - organizational level, job category or even kind of training
Example - Organizational Level - Human Resources (HR)
Example - Job Code - Customer Service (CS)
Example - Kind of Training - Safety Training (SAFE)
Part 2: Course Name Abbreviation
(1) An abbreviated course name helps to identify the course just from the code
Example - Course Name - First Aid & CPR (FA-CPR)
Part 3: Version Number
(1) Most of the time you will use the course as long as you don't need to make changes to it. Once you do, you will want to copy the course and create a new one. Thus, it is suggested that you add a number to the end so that you can track the iterations of courses you create.
Example - Version Number (01)
Putting it Together...
Example 1 - Company - Course - Version
(1) Visibility Software
(2) Excel Beginner Course
(3) Version 1
Coding Scheme: VS-EXCELBEG-01
Example 2 - Category - Course - Version
(1) Computer Skills
(2) Excel Advanced Course
(3) Version 5
Coding Scheme: COMP-EXCELADV-05
Other Important Coding Considerations:
- The Course Code functions as other codes do in Cyber Train and cannot contain certain symbols such as commas, quotes, periods, apostrophes or ampersands and the user will get an error message when trying to enter or import codes containing them.
- There are also certain character combinations that must be avoided because Cyber Train is programmed to strip them (even if they are in the middle of a code or description) as they can be used by others to reference potentially dangerous procedures or scripts that could cause harm to your Cyber Train system. These combinations include: SP_ or sp_ and XP_ or xp_.
- A double dash will be converted to a single dash.
Back to the Top
There are many fields that can be included, but there are only three (3) that are required (in red below). The rest as listed below are optional, but those with an * are recommended, especially when setting up the system initially.
| Field Name |
Type |
What is it? / Where to find it? |
| Company |
Code |
Pull from Admin > Codes > Companies - Code not Description |
| Course ID |
Text Field (50 char) |
Enter the Course Code (see recommendations and considerations above.) |
| Course Name |
Text Field (100 char) |
Enter the Course Name (up to 100 characters) |
| Active* |
Code (hard coded) |
Enter Y (Yes) or N (No) |
| Description* |
Memo |
Any description as desired for this Course. It is recommended that this contain ONLY text and not HTML. |
| Course Type* |
Code |
Used to help identify course type for reporting. Pull from Admin > Codes > Course Types - Code not description |
| Grade Type* |
Code |
Used to established the kind of grade type. Pull from Admin > Codes > Grade Types - Code not description. Note: for courses that will always be ODT (On Demand Training) use PF (Pass/Fail); for SCORM or OJT (On-the-Job-Training) |
| Training Admin* |
Code |
Pull from Admin > Security > Users - User ID for the person responsible for this course |
| Approver 1-5* |
Code |
At least one approver is recommended if Opt Out is being used, but there may be up to 5 imported. Enter UserID for the approver OR enter the codes TA (Training Admin), MGR (Manager), or MGR2 (Secondary Approver). For User ID pull from Admin > Security > Users. |
| Notification 1-5 |
Code |
This is for notification only of action such as Opt Out. Enter UserID or enter the codes TA (Training Admin), MGR (Manager), or MGR2 (Secondary Approver). For User ID pull from Admin > Security > Users. or Pull from Admin > Security > Users - User ID |
|
Renewal Frequency*
|
Code |
Hardcoded: If the renewal frequency is based on a specific Month the format of the code to enter is 1##/ where the number signs indicate the month, for example January is month 01 so the code for January is 101/. May is month 05 so the code is 105/. December is month 12 so the code is 112/. If the renewal is based on Days (D), Months (M), or Years (Y), combine this with the number of days/months/years first, then a forward slash to get the value. For example: 30/D = 30 Days; 6/M = 6 Months; 1/Y = 1 Year. |
| Based On* |
Code |
Hardcoded: If the renewal above is not based on a Month, the following codes are available to use on which to base the renewal: DATEATTAINED, JOBSTARTDATE, HIREDATE, BIRTHDATE |
| Passing Score |
Number (1-100) |
If you have test questions that will be added, even it is just one, it is suggested to put in a passing score. With no score students that have accessed the course will pass if nothing is there. |
| CEU |
Numeric (0.00) |
Enter the number of CEU's associated with this course as needed |
| Credits |
Numeric (0.00) |
Enter the number of Credits associated with this course as needed |
| Fee |
Numeric (0.00) |
Enter the Fee associated with this course as needed |
| Hours |
Numeric (0.00) |
Enter the number of Hours associated with this course as needed`M |
| Misc (1-20) |
Text or Code fields as defined |
These course Miscellaneous fields may be used as defined. Enter data in the spreadsheet to match the field type (i.e. code table or text.) |
Use the COLUMNS to hold the fields that should be included in the import and each ROW for the entire course record.
Below is an example of a course import spreadsheet.

IMPORTANT NOTES:
1. Before saving the spreadsheet for import, always remove the column headers, but make note of the fields included and the order.
2. When modifying a spreadsheet, be sure to delete ROWS and COLUMNS that are not needed instead of Edit > Clear Contents; otherwise the import will recognize those blank ROWS and COLUMNS and generate an error or add blank records.
3. Before import, make sure to save the spreadsheet as an Excel 1997-2003 file (i.e. an xls file) as the import cannot accept an xlsx file.
Back to the Top
- Use the field lists on the left hand side to Add >> any additional fields to the right hand side that are in the spreadsheet.
- Be sure the fields listed on the right hand side are in the same order as the COLUMNS in the spreadsheet. Use the Move Up and Move Down buttons to rearrange the fields as necessary.
- If too many fields are listed on the right hand side use the << Remove button to take off the field.
- Once all the necessary fields are selected on the right hand side and they match the order of the fields on the spreadsheet click the >> Continue button.

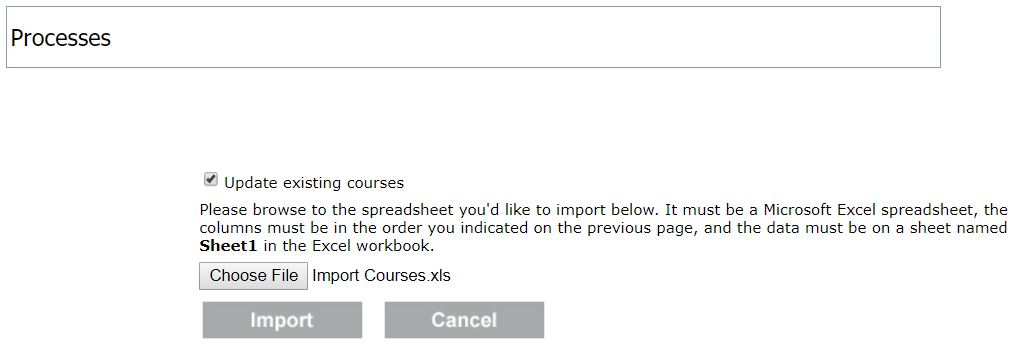
On the next page select your spreadsheet and decide if you want the spreadsheet is geared toward new courses only or an update to existing courses. Check the checkbox - Update existing courses if there are CourseID's on the spreadsheet where the information should be updated. Else, if one is only using this import for new courses and there could accidentally be repeats on the spreadsheet, don't check the checkbox and it will not update or import duplicates.
When ready click the Import button.
Back to the Top
Why am I getting an error when trying to import my spreadsheet?
Make sure that the worksheet has the same number of columns as fields selected in the setup. Note: if contents were cleared from a column instead of deleting the whole column, this could cause issues.
Make sure that the spreadsheet is saved as an xls file and not an xlsx file. Cyber Train can only import xls files.
Make sure that the name of the page in the worksheet is Sheet1, anything else will cause an error.
See also
|