Home > Training Admin Role > Students > Find Student
Find Student
Students > Find Students
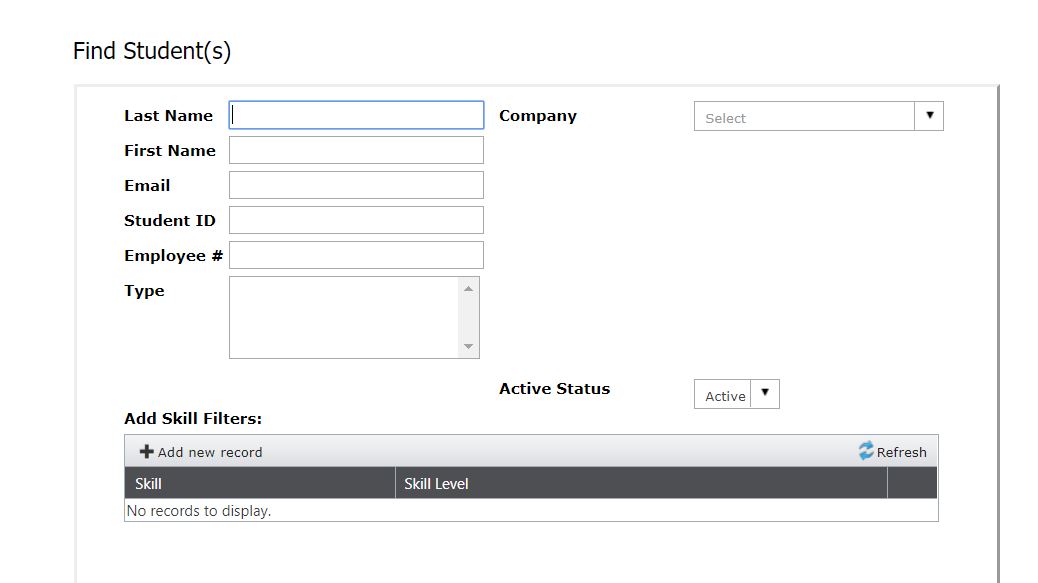
The Find Student feature allows one to find students profiles in the system via different criterion.
|
Search Criteria
|
What it Does
|
|
Last Name
|
Finds students by last name and can do a partial search as well. Pulls the information from Student File > Contact Info Page > Contact Tab – Last Name Field.
|
|
First Name
|
Finds students by first name and can do a partial search as well. Pulls the information from Student File > Contact Info Page > Contact Tab – First Name Field.
|
|
Email
|
Finds students by email address and can do partial searches. Pulls the information from Student File > Contact Info Page > Contact Tab – Email Field (NOTE: The email address considered in this search is the one that is ‘primary’ determined by the Primary Email field)
|
|
Student ID
|
Finds students by Student ID. To find a student id, do a Students > Find Students search. Next to the name is the Student’s ID in parenthesis. This ID not user defined, rather is automatically assigned to every student entered into the system and if a student is deleted, the ID is not recycled.
|
|
Employee #
|
Finds students by Employee #. Pulls the information from Student File > Contact Info Page > Job Details Tab – Employee # Field.
|
|
Type
|
Finds students by Employee Type. Pulls the information from Student File > Contact Info Page > Job Details Tab – Employee Type Field
|
|
Company
|
Finds students by Company. Pulls the information from Student File > Contact Info Page > Job Details Tab – Company Field
|
|
Org Level 1-5
|
Finds students by any and all Organizational Levels. Pulls the information from Student File > Contact Info Page > Job Details Tab – Organization Info Table. (NOTE: The organizational levels considered in this search are the ones set to ‘primary’ determined ‘Primary’ status in the column)
|
|
Job Title
|
Finds students by Job Title. Pulls the information from Student File > Contact Info Page > Job Details Tab – Job Info Table. (NOTE: The job title considered in this search is the one set to ‘primary’ determined ‘Primary’ status in the column)
|
|
Hire Date Range
|
Finds students by Hire Date. Pulls the information from Student File > Contact Info Page > Job Details Tab – Hire Date Field.
|
|
Job Date
Range
|
Finds students by Job Date. Pulls the information from Student File > Contact Info Page > Job Details Tab – Job Info Table. (NOTE: The job date range considered in this search are ones set to ‘primary’ determined ‘Primary’ status in the column)
|
|
Search ‘Active’ Only
|
Finds students by Active Status. Pulls the information from Student File > Contact Info Page > Job Details Tab – Student Status Field.
|
| Add Skills Filters |
Finds Students by Skills and Skill Levels. The more skills that are added the smaller the list of students returned will be. It pulls the information from Student File > Skills Page. |
Once the filters are set and right group of students are returned. The page looks like this:
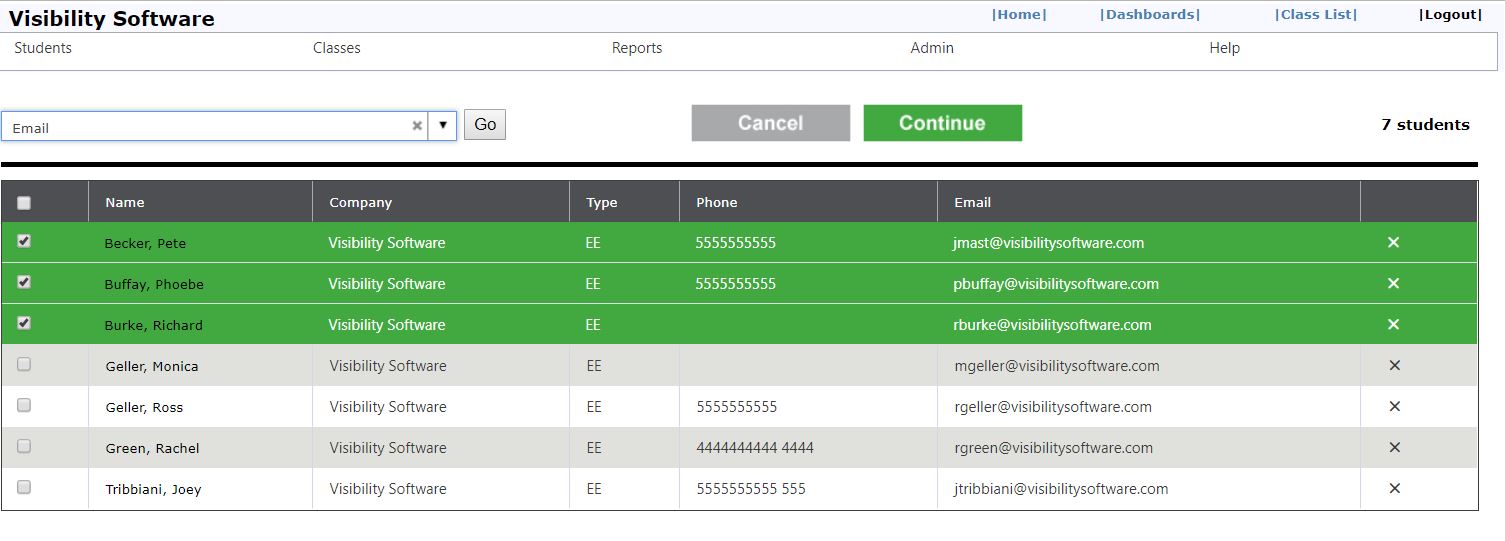
From the student results page, review the information:
(1) If one is looking for a student profile, click on the Name in the Name Column to enter that person's file.
(2) Use the information on the page to either Phone or Email the student as needed.
(3) Else, there is a drop-down box above the table with three (3) options: Email, Reset Passwords, or Print Letter/Certification.
To use these options:
(1) Select students using the check-boxes in front of the student’s name. To Select All, click the box in the header tor click it again to Deselect All as needed. Or one can use hold down the CTRL key to pick and select multiples or hold down the SHIFT key to select many in a row.
(2) Select the drop-down option needed.
(3) Click the Go button.
Email Option
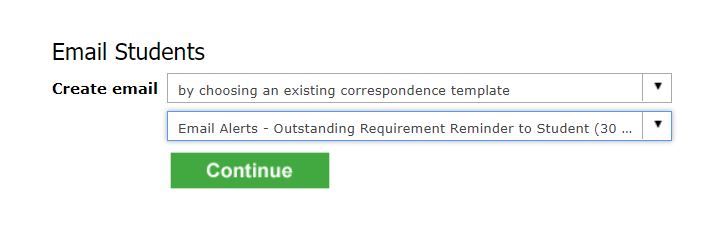
In this option, select from the Create email drop-down either by choosing an existing correspondence template or by typing in an email from scratch. If the correspondence option is selected, the page refreshes with a second drop-down option with already created and established templates. Click the Continue button when the appropriate option is selected.
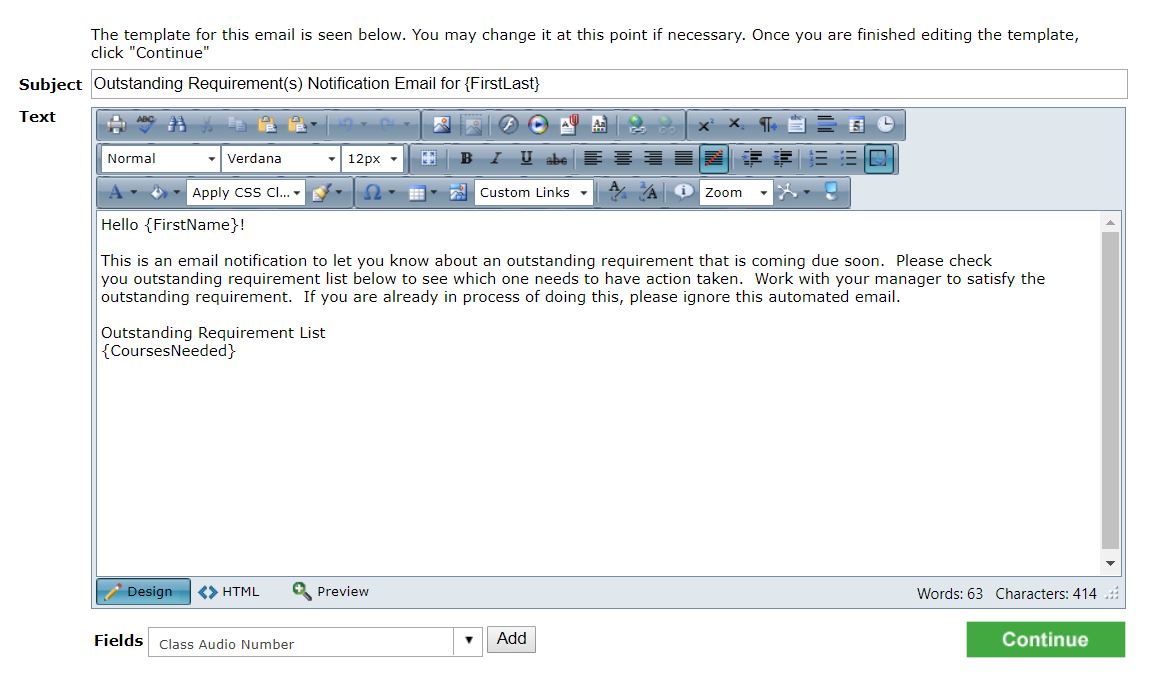
Either option results in a page like this with an HTML editor. If a template was selected, the template defaults into the editor with the Merge Fields being used. If from scratch was selected, then the editor will default to a blank one. Both have the option of adding Merge Fields using the drop-down list at the bottom of the page.
NOTE: Particular merge field will not merge information from this location. For example, course or class information will not merge from this location because there is no way to know which classes/courses for which group of students selected will work to merge.
To add a merge field:
(1) Select the desired field first
(2) Put the cursor in the editor where the merge field will go
(3) Click the Add button to insert the merge field
Click the Continue button when the template looks good.
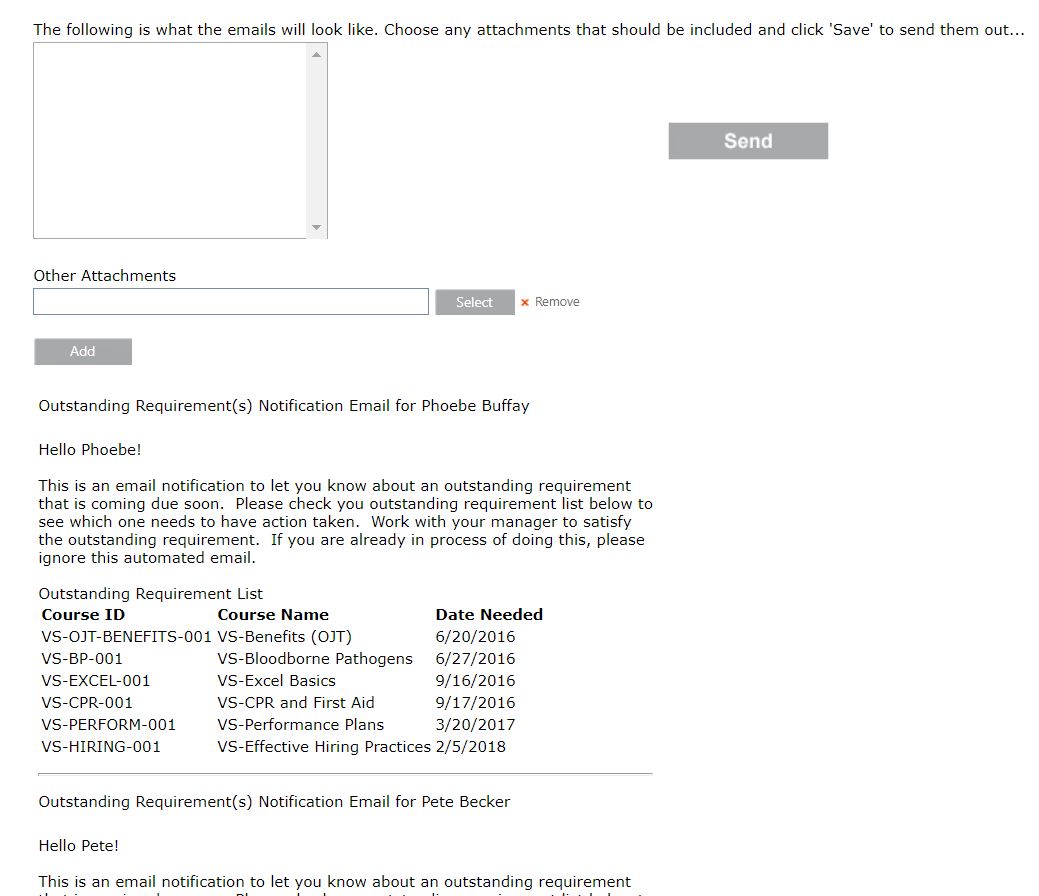
The Preview Page is broken into four (4) sections.
Section 1: Errors
This first section only displays IF there are errors. For example, if one of the student's selected does not have an email address. That person will be listed in this section and will need to be contacted via another method until an email address is an acceptable form of communication with that student. If there are no errors (like the screenshot above) then the table will not display.
Section 2: Attachments
This selection box pulls from Admin > Page Builder > Correspondence Templates > Available Attachments Tab. To attach a document, click on it so that it is highlighted. To select more than one hold the CTRL key down. If there are no attachments to select from, that means there are none that were already loaded to the system.
Section 3: Other Attachments
If there needs to be another attachment in the email that is not already loaded into the system, click the Select button to browse the computer or network. Click the Add button to add more documents as needed. If the wrong the document is added, click the Remove icon to take it off and add the right one.
Section 4: Email Preview
The fourth section is the actual email and how it looks to each student. If something does not look right, click the Back button to fix the email template. If the emails look right, click the Send button. This sends the email to all students selected.
Reset Password Option
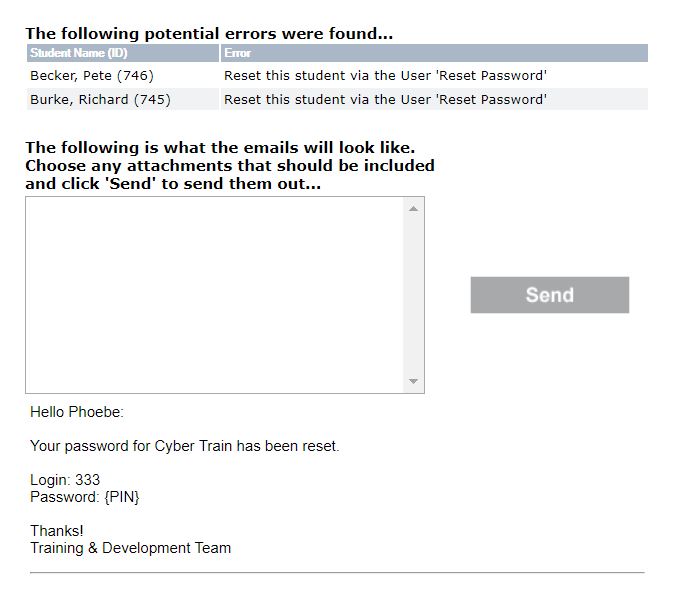
The Preview Page is broken into three (3) sections.
Section 1: Errors
This first section only displays IF there are errors. For example, if one of the student's selected does not have an email address. That person will be listed in this section and will need to be contacted via another method until an email address is an acceptable form of communication with that student. If there are no errors (like the screenshot above) then the table will not display.
Section 2: Attachments
This selection box pulls from Admin > Page Builder > Correspondence Templates > Available Attachments Tab. To attach a document, click on it so that it is highlighted. To select more than one hold the CTRL key down. If there are no attachments to select from, that means there are none that were already loaded to the system.
Section 3: Email Preview
The fourth section is the actual email and how it looks to each student. If something does not look right, click the Back button to fix the email template. If the emails look right, click the Send button. This sends the email to all students selected.
Print Letter/Credential Option
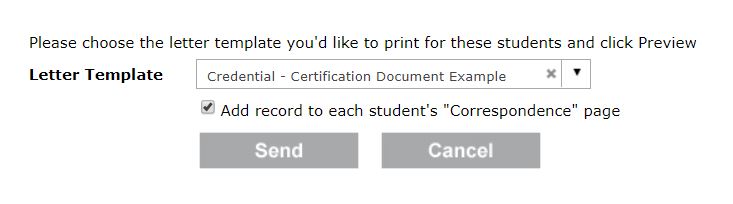
From this option, the Letter Template pulls from the Admin > Page Builder > Correspondence Templates > Custom Templates. Thus, if the letters are not pre-populated there first, nothing displays here. Select the one needed and decide if the letter needs to be added to the student's profile. If the checkbox is not checked, it just creates the letter to print. However, if the letter should be printed and recorded, check the checkbox Add record to each student's "Correspondence" page. When done if click Send button.
|